Updated November 2020
Going super-light with your backpacking gear is great.But every now and then, it’s nice to be able to fry up some eggs or a fresh fish while out on the trail.And that’s where a great backpacking frying pan comes in.
Enjoying a meal after a long day of hiking is part of the experience for many, and just reheating water or freeze-dried foods won’t cut it sometimes. But at the same time, you don’t want to add unnecessary pounds to your pack with a hefty skillet.Fortunately, lightweight pots and pans are not impossible to find. In fact, I’ve cooked pancakes at 9,000 ft in the Wind River Mountains on iron skillets. This article will give you everything you need to know for picking the right lightweight backpacking frying pans for baking, cooking and searing.But first, let’s jump right into a side-by-side comparison of the best pans on the market in 2018.
Comparison Chart
|
Name |
Price |
Weight |
Rating |
Notes |
|---|---|---|---|---|
|
1) Sea To Summit Alpha Frying Pan  |
$$$ |
8.48 oz |
Ergonomic flip up handle with safety lock for secure and effortless operation |
|
|
|
$$$ |
12 oz |
The NOLS-Style Lid has a wingnut installed with a bolt through a single hole in the center of the lid |
|
|
|
$$$ |
5.9 oz |
Removable pot handle |
|
 |
$$$ |
11.4 oz |
Strong, reliable stainless steel fry pan stands up to heavy use and extreme conditions. |
|
|
$$$ |
1.2 lbs |
Includes 3-cup boiling pot with lid, 6.25″ frying pan with locking handle and stainless steel plate |
||
|
6) GSI Outdoors Bugaboo Frypan 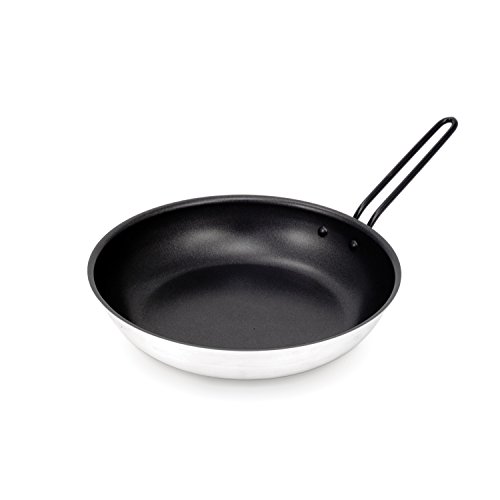 |
$$$ |
1 lb 2 oz |
SureLock folding handle provides a sturdy, stable grip and conveniently folds into the pan for storage; 14-inch model with removable handle |
|
|
|
$$$ |
10 oz |
For use on a backpacking or camping stove only; not for use on a campfire or open flame |
|
|
8) GSI Outdoors Glacier Stainless Frypan |
$$$ |
7.5 oz |
Exclusive SureLock folding handle |
|
|
9) Bushcraft Takibi Frying Pan  |
$$$ |
1.11 lbs |
Japanese word TAKIBI which means CAMP FIRE. |


How to Choose the Best Frying Pan for Backpacking
What Kind of Pan do You Need?
Choosing a pan depends largely on what you want to cook. In the world of backpacking, multipurpose items are critical to maintaining a concise and lightweight pack load. The same is true of cookware. Consider:
- What types of food will you fry?
- Will you want to do any baking?
- How many in your party?
- Will you be cooking group meals?
If you’re using your backpacking frying pan exclusively to fry and sear meat, such as trout caught while hiking, you may want a more traditional fry pan.Maybe you want to do some baking, make some backcountry bread, craft some delicious cinnamon rolls, or let out your inner Iron Chef. In oppo freeware data restore this case, you might be able to find a frying pan that can pull double duty and actually work to bake some limited items as well as sear that delicious rainbow trout.For group meals, you might want to go up a size in both width and depth of the pan. Some pans are offered in multiple sizes and the best size for group-hiking is rarely the same as the most optimal solo hiking fry pan.
Handling Your Fry Pan (yes, really)
If this seems like an odd topic, just keep in mind that hot water burns are the number one cause of hiking injuries each year. Handling your hot fry pan without dropping your food or scalding yourself can be easier said than done if you fail to prepare adequately.Whenever possible look for some of these features:
- Folding handle
- Locking handle
- Secondary handle
- Pot Grips
Folding handles are important because a full-size fry pan with a long handle can be 16+ inches. That’s too big to fit well in any backpack. Folding handles keep most fry pans at less than 10″ overall.Like a folding knife, your folding panhandle needs to lock in place. You definitely don’t want to burn yourself or lose your food because your fry pan had a weak lock.A small secondary handle can be really nice, particularly for larger pans. Some pans have them built-in, opposite the main handle. Otherwise, you may want to keep a pair of pot grips around as a backup. They can be a real lifesaver.
Frying Pan Weight
Since we’re talking about backpacking the conversation always has to go toward weight. No matter how cool your pan is, if it’s too heavy to carry, then it won’t do you any good.
What, exactly, is too heavy to carry for a frying pan? I think that depends on your body weight, your fitness level, the type of pack you’re carrying, your base pack weight, and how important that darn pan is to you.
Remember that pack weight should not exceed 25-30% of your total body weight as a rule.
What I’d recommend is that you choose the lightest pan that can still get the job done you’re asking of it.
Remember, however, that in an apple to apple comparison lightweight metal is typically thinner than heavier. Thin metal does a poor job of dispersing heat and so you’ll run into problems like hot spots and scorching. (This is, partly, just the nature of the less-than-perfect cooking instruments we carry on the trail.)
If you’re going to use your frying pan for a single meal during a 5-day backpacking trip then I would say it merits as little weight as possible. If, however, you plan to cook with your frying pan every day of the trip then you may want to allocate a little more weight to a quality frying pan.
It’s true that lighter is better for backpacking. However, frying pans sometimes lack performance when made from the lightest materials. It’s up to you to balance this choice with the contents of your pack when deciding how lightweight to go.
Backpacking Stoves For Frying Pans
Because backpacking frying pans tend not the be quite as good as your home skillets, we must be careful with how we use them.
Materials like titanium and aluminum, particularly when made very thin, conduct heat a lot differently than your thick cast iron pans at home.
If you use a pocket stove on a canister and crank that bad boy up, you’ll be in for a surprise in your frying pan! Many simple backpacking stoves intended for boiling asoftech photo recovery water have one setting – super high. On thin frying pans, these extreme heat output stoves can cause permanent warping of the metal or near-instant burning of your food as hot spots develop rapidly.
No matter how high quality your frying pan is, you’ll have a better and more successful time with it if you get a stove that can simmer.
Many of the canister stoves now have better simmer control. Additionally, the liquid fuel stoves such as the Whisperlite (with practice) and Dragonfly can simmer quite well.
You’ll probably want to avoid the alcohol stoves, esbit stoves, and wood stoves. These stoves only have an on and off which, other than, moving the frying pan away from the fire, can’t be adjusted.
Frying Pan Size
Since you’ve got to shove this thing into your backpack we have to be a bit concerned about size. While you might get away with a Wok at home on the stove, it’s not gonna fly on the trail.
Backpacking frying pans range in size from 3-4” diameter up to 8-10” diameters.
In my experience, the small-diameter frying pans that are often featured as lids on pots just don’t cut it. These tend to be in the 4” range and they’re not good for much. Because of the size and the lightweight material, they’re made from these lid/pan combos are really next to useless.
If you’re going to carry a frying pan I recommend a dedicated standalone pan. Something at minimum 6” diameter will at least have enough room to be functional. Anything above about 10” diameter, however, will be very difficult to pack into your backpack.
My recommendation when trying new gear is to take your backpack to the store and test the gear to see if it fits in your bag. Of course, many frying pans are online orders only so this can be challenging but check your local outfitter first to see if you can try something in person.
Frying Pan Material
In the world of backpacking frying pans, there are three material choices:
- Cast Iron
- Aluminum
- Titanium
Aluminum and titanium are the metals of choice for creating most backpacking equipment. Also, cast iron is a viable option for a backpacking frying pan but is only applicable in some situations. Let’s compare all these materials:
Cast Iron
- Extremely heavy
- Price ranges greatly
- Bulky – can’t be folded
- Applicable in only a few situations
- Thick material, even heat distribution
Aluminum
- Lighter weight
- Lowest price
- Used in many variations of frying pans
- Thermal conductivity can vary depending on thickness of material in use
Titanium
- Lightest weight
- Prices tend to be high
- Less common than aluminum
- Material itself is usually quite thin, making uneven heating a burning a problem
Cast iron is only used on occasion and generally when cooking is a priority and hiking is a side note. Cast iron pans are insanely heavy, can’t be folded, and take up tons of pack space. But they’re still viable options for canoe camping, horse packing, or short hiking trips into the main basecamp from which small day hikes will be made.Cast iron is by far the most superior option for quality of cooking. Though due to its weight it can actually be too heavy for some backpacking stoves, requiring a normal fire to cook on.Aluminum is an inexpensive option that makes up a good portion of the options available on the market. It’s lightweight, comes in many designs of fry pans, and can handle just about any situation.Titanium is expensive but very lightweight. It tends to be used in lightweight cooking gear and because of that the metal is usually quite thin to keep the weight down. Thin metal makes a difficult material to cook on and can be prone to burning or scorching.It’s worth mentioning that stainless steel also gets used for backpacking frying pans on occasion. When you find one made from SS, it’s usually inexpensive, durable, and easy to use and take care of. But stainless steel is quite heavy!
Non-Stick Linings
Backpacking frying pans get messy. That’s all there is to it.Non-stick linings and coatings can help with this. There are a few things to be aware of when shopping for a coated frying pan though.Coatings are notorious for being found to be unhealthy or carcinogenic when used for cooking. If you’re a health-conscious individual, make sure to thoroughly research the material being used to coat your backpacking fry pan.Backpacking stoves also tend to put out tons of heat in small areas. They’re not as good as house stoves at spreading out and evenly heating your fry pan. For this reason, peeling, bubbling, or burning of coatings on backpacking cookware is very common.Personally, I’d rather just rely on ample amounts of butter or oil to reduce any scorching and skip the linings.
Cleaning Backpacking Fry Pans
By avoiding non-stick linings the cleaning process for backpacking pans becomes so much easier. There are many ways to do it but here are a few suggestions:
- Scrub the pan with sand or dirt, and water – rinse with soap and water
- Scrub the pan with steel wool – rinse with soap and water
- Scrub the pan with a brillo pad – rinse with soap and water
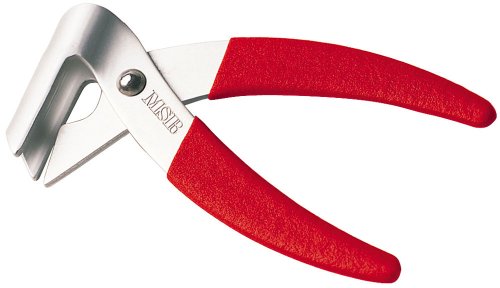
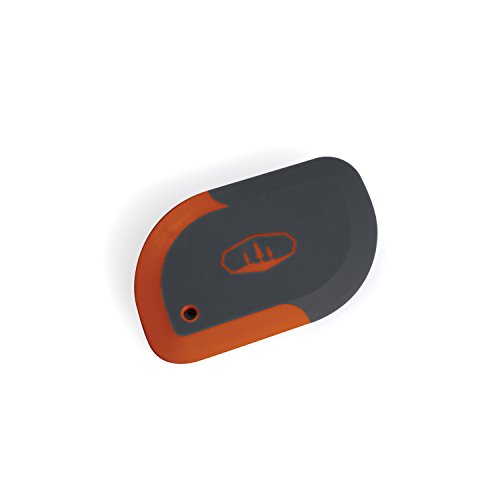
- Use a pot scraper (amazing tool) – rinse with soap and water
If you do go with a frying pan with a non-stick lining, be sure to only use silicone and soft scrubbies. Most of the aforementioned methods of cleaning will destroy non-stick linings.
Don’t forget that you still need to sanitize your kitchen utensils! Just scraping off the big stuff won’t keep you safe. Gastrointestinal illness is one of the top health problems on the trail every year.
I like to use Dr. Bronner’s peppermint soap. It’s a good choice for washing hands, clothes, minor wounds, brushing teeth, washing hair, etc.
Our Picks: The Top 9 Backpacking Frying Pans of 2020
1) Sea To Summit Alpha Frying Pan
This frying pan really just checks all the boxes we could want. It’s lightweight, compact, and gets its job done while leaving many others in the dust!
- 8.6 / 11.8 ounces
- 8 / 10” diameter available
- Collapsible handle
This frying pan comes in two flavors – 8” or 10” diameter. The smaller frying pan weighs 8.6 ounces and the bigger one hits the scales at 11.8 ounces. These weights are super impressive for the sizes!
Sea to Summit used some pretty advanced tech on this pan. It’s coated with a heat-dispersing non-stick liner. This is a really big deal because backpacking stoves have a tendency to scorch frying pans due to their thin construction.
While there are lighter frying pans on our list, this one balances all the features extremely well.
2) Alpine Fry-Bake Set

Enter your text here…An often overlooked backpacking frying pan, the Fry-Bake is a piece of modern ingenuity. And few hikers know about this great piece of cookware that sees heavy use by expedition powerhouse group NOLS. It gives you:
- Varying sizes available
- 11oz +
- Varying depths available
- Customizable options
Fry-Bake is a company that makes several different pans which, also, are called Fry-Bakes.Their pans and lids are made from spun aluminum with a very thin, hard layer of clearcoat. This coating is cooking safe and prevents most of the problems of sticking food.I’ve used Fry-Bake pans to fry trout, bake cinnamon rolls and even make pizza while in the backcountry. And weighing in at under 12 ounces, this little pan is well-worth the price.Pro tip: Order the NOLS style lid with your Fry-Bake if you want to add customizations and your own handle. Be sure to also pick up a set of pot grippers.
3) MSR Quick Skillet

As one of the lightest weight frying pans for backpacking, the MSR Quick Skillet deserved a place on our list.
- 7.75″ capacity
- Removable handle
- Only 5.9oz
- Non-stick
While it’s not the largest frying pan available, it is one of the lightest. We can’t have it all, eh? That makes this skillet a perfect choice for those who want to keep it light but still whip up gourmet food.The hard aluminum pan has a rolled edge which provides plenty of strength. Due to the thin material used, however, be careful not to crush the pan. Careless packing could result in a dented pan when you set your pack down.I like the siliconized removable handle. Leave it behind altogether if you prefer to use pot grips. It makes the high-walled pan design possible without needing a folding handle – it just pops off.By far the biggest advantage of this frying pan is the lightweight design.
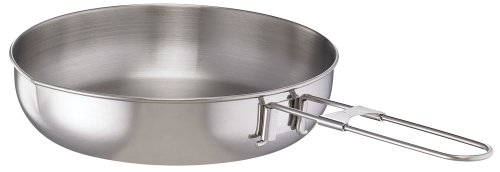
4) MSR Alpine Fry Pan
We already decided that frying pans for hiking aren’t the best idea for ultralight purists. And that’s all the better because you’ll want to have a decent size backpack to handle this full-size frying pan from MSR.
- 7.5″ diameter
- Removable handle
- Stainless steel + aluminum
- Nestles with other MSR cooking products
MSR is a renowned producer of backpacking cooking gear. From frying pans to stoves, MSR has been making cooking gear for years.Their alpine fry pan is made of stainless steel. There are no coatings to be found on it. That means it’s durable, robust, and can be cleaned aggressively without damage.Underneath is a clad aluminum base that adds bulk and aids in heat distribution. This means food fries more evenly and cooks more thoroughly.Overall this is a solid hybrid with a blend of features to bring you great frying capabilities in a lightweight, compact package.
5) Stansport 360 Stainless Steel Mess Kit
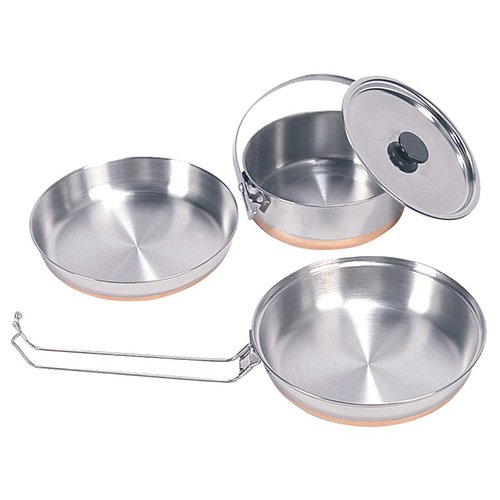
Maybe a bit more cookware than most of us really need in the backcountry, but it’s a great set. This set is based on a stainless steel and copper hybrid. The whole set nestles together into a tiny package (considering its size) and has a carrying case.
- 6.25″ frying pan
- Folding handle
- Nesting design
- Stainless steel + copper
While it’s going to be a tough pill to swallow for lightweight backpackers, the set is a solid option for robust cooking options. If you’re frying fish or cooking complex meals in the backcountry it’s sure to serve the purpose.I do like that it’s a stainless steel based set which means you don’t have to be delicate when cleaning or carrying.This is an ideal set for those who prioritize cooking above traveling light and fast. Remember, you can always leave some of the pots and pans at home if you don’t need them all on each trip.
6) GSI Outdoors Bugaboo Frypan
This 10″ frying pan is a bit bigger than the others on our list. That means you’ll need more room to carry it but you’ll be able to fit a lot more food to fry.
- Fully aluminum design
- Coated Teflon bowl
- Folding handle
- 10″ capacity
Thanks to the thicker, solid aluminum construction users rate the heat distribution as above average. Of course, you’ll have to still be careful because it is possible to scorch that Teflon lining.Speaking of Teflon linings, this is the first skillet on our list with a lining. You can expect ease of cooking and cleaning with a Teflon lining. Be sure to only use silicone utensils and soft cleaning brushes or you’ll damage the lining.Once Teflon coatings have been damaged, they seem to just continue to peel and flake off forever. Treat the frying pan right, however, and it will make cooking so much easier!
7) Sea to Summit X-Pan – 8″
One of the lighter weight options on our list, the X-Pan comes in at a breezy 10 ounces. It’s also made by Sea to Summit which remains one of my favorite backpacking accessory brands.
- 8″ capacity
- Two folding handles
- Anodized solid aluminum construction
For the weight and quality, I think this pan makes one of the top overall picks on our list for lightweight hikers. While other pans on our list may be thicker or help distribute heat better, the X-Pan makes lightweight hiking still possible with gourmet tools.I really like that there are two folding handles. These handles are siliconized with a very ergonomic grip to make easy, positive grip a sure thing so you don’t dump your food on the ground.By far the biggest complaint about this pot is sticking issues. Because it’s made from aluminum, rough scrubbing may also not be an option without damaging the pot. This, unfortunately, creates a pan-paradox where hikers must decide if the features of this fry pan are worth the sticking…
8) GSI Outdoors Glacier Stainless Frypan
GSI is another one of those brands that are just doing it right. They’re leaders in outdoor hiking accessories because they’ve had lots of practice. Now we get a refined, full-size fry pan from them that won’t let you down.
- 10″ capacity
- Folding handle
- Laser etched non-stick surface
- 23.5 oz
While it’s well over twice as heavy as the Sea to Summit X-Pan, it has a few features you won’t find there.The deep walls of the frying pan make it easy to whip up large meals. Plus, it’s a full 10″ diameter which is comparable to many home kitchen fry pans.Like some of the other pans on our list, GSI has combined stainless steel and aluminum to get the best of durability and heat distribution. That means more thorough cooking and less accidental bending in the pack.Users also rave about the non-stick laser etched lining that keeps food from sticking to the pan. Just remember, all these features come with a nearly 1.5-pound weight.
9) Bushcraft Takibi Frying Pan
Maybe one of the most interesting frying pans on the market right now is the Takibi. This ingenious little skillet is light, efficient, and effective!
- 17.8 ounces
- Add your own handle
- Very packable
This frying pan is a bit different than your usual. It’s almost flat with very short sidewalls. That makes it hard to cook big piles of grub, but easier and more efficient to pack.
This pan is made from treated steel. It’s thin and light but durable enough to do its job. At just a shave over one pound it comes in among the lightest on our list.
At almost 9” of diameter I think it’s a great balance of size, weight, and function. However, that weight and size savings comes at one cost. You’re going to have to make your own handle.
The skillet has a socket into which you can put a stick that functions as a handle. I like this idea a lot because it reduces size and weight while maintaining function.
Conclusion
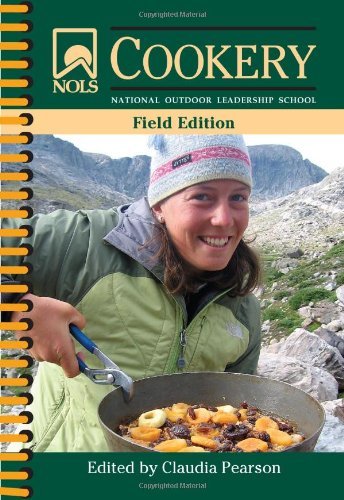
Heading into the backcountry to go hiking doesn’t always mean we have to go ultra lightweight. Taking a little extra weight on your back to enjoy the finer parts of life is always an option.For anglers or those with a penchant for fine cooking, there are many delicious handmade meals to be crafted in the backcountry. The NOLS Cookery: Field Edition is perhaps the most concise and comprehensive guide to thorough backcountry cooking available. So start there!
Remember that you’ll have to consider what you want to fry, how many people you’ll cook for, and whether you want other options for cooking. These decisions all play a part of making the best possible choice about which backpacking frying pan belongs in your pack.As you develop your backpacking skills and your backcountry cooking skills, your needs may change. Don’t be surprised in the future to find yourself looking for a new backpacking fry pan because old ones have worn out, don’t work for your needs anymore, or you decide to test new waters.Remember that backcountry cooking takes some ingenuity and a lot of perseverance.