If you’ve spent much time on the trail at all, chances are good that you’ve already experimented with a bunch of different backpacking cookware.
More...
Sporks, forks, bowls, plates, pots and pans are available in so many sizes and shapes that it seems a neverending task to determine which ones are right for you.
Luckily, I’ve spent hundreds of nights on the trail guiding trips and I’m going to save you from a handful of regrettable mistakes. In this guide, I’ll help open up the conversation about what works and what doesn’t when it comes to backpacking cookware. Of course, each of us has different needs and preferences so there’s no “one size fits all”. I’ll do my best to guide you through your choices, options, and considerations while leaving you the room you need to make your own decisions.
Gear Category | Our Top Pick | Weight | Rating | For More Information |
|---|---|---|---|---|
 | 12 ounces | |||
 | 12 ounces | |||
 | 0.65 ounces | |||
 | 1.6 ounces | |||
 | less than 12 ounces |
How to Decide What Cookware to Bring
There are several key factors to keep in mind when you’re finalizing cookware choices. Among other things, important factors include:
Hiking With a Group
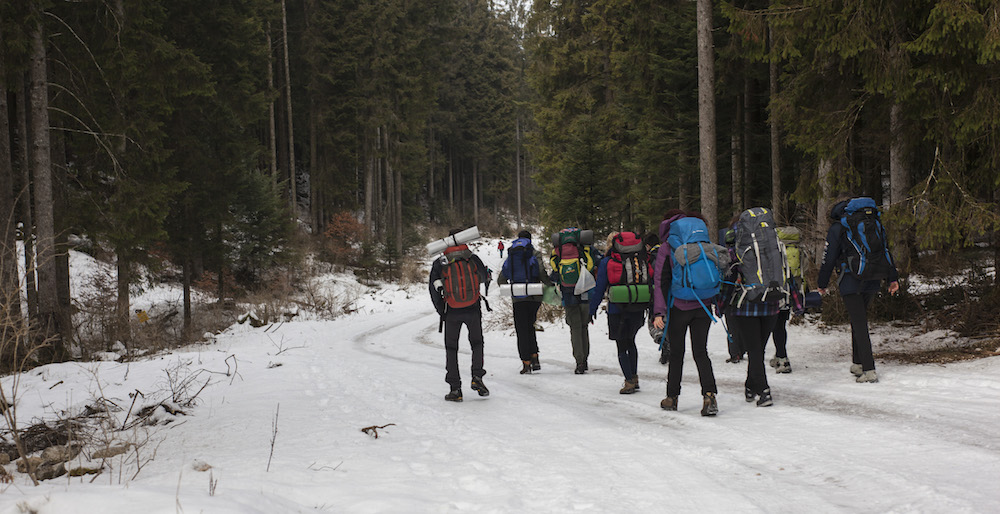
When you travel the backcountry with a group there are pros and cons. While other hikers may get on your nerves after a while, there’s no denying that sharing gear makes everyone’s pack lighter.
When hiking with a group you need to change your gear to meet the group’s needs. For instance, you might carry one larger frying pan instead of 4 individual skillets. This extra weight and bulk are offset by the fact that another member of the group carries fuel and yet another member carries the stove.
Whenever you hike with a group you need to coordinate before you hit the trail. For instance, if you’re cooking large group meals together, you’ll need a bowl. For those of us who normally solo hike and use freezer bag methods, we may not typically carry a bowl at all.
Before hiking with a group find out:
Cooking Styles
There are three major branches of the cooking tree from my perspective. Among them are:
Choosing your cooking equipment is going to be largely based off of which style or preference you have. Of course, I’m only outlining these “categories” of cooking to help illustrate decision points for this article.
For those utilizing a freezer bag or ultralight cooking style, the only utensil necessary may be a long-handled spoon. Your freezer bag acts as the bowl! This type of cooking is great for those looking to shave every possible ounce.
If you’re making “rapid meals” on something like a canister stove, you may also only need a long-handled spoon. For instance, a JetBoil stove acts as the stove, pot, and bowl all in one.
For both ultralight stoves, such as Esbit or alcohol, and canister stoves you’ll be able to easily get away with very few pieces of cookware. With these minimalist setups all you need is:
Of course, with both a canister stove such as the JetBoil or a liquid fuel stove such as the MSR Whisperlite you can cook more extensive meals. In this case, you’ll have to adapt your cookware to suit.
More than freezer bag cooking or reconstituting food on a canister stove, full meal preparation on the trail is cookware intensive. Examples of full meal preparation include baking bread (yes, it can be done on the trail), cooking personal pizzas, or cooking pancakes.
As you can imagine all of these types of cooking and baking require a lot more than just a simple stove. You’ll need pots, pans, fry-bakes, and often skillets. You’ll also need spatulas, ladles, and other types of specific food preparation utensils.
Before we go further ask yourself what kind of cooking appeals to you. This dictates almost all of the decisions you’ll make about cookware.
Should You Use Ultralight Backpacking Cookware?
There’s nothing bad about ultralight cookware. However, what you need to understand is that a lot of ultralight gear has limitations.
I think we can agree that among two equal items, most backpackers will choose the lighter version. For that reason, I’d recommend using ultralight or lightweight gear whenever you can!
Don’t be fooled, however. It’s common for low-quality gear to be advertised as “ultralight” while not necessarily being the lightest weight option available on the market. Just because it’s labeled “lightweight” doesn’t automatically make it the perfect piece of gear.
As we discussed earlier, when it comes to ultralight cookware things tend to be very minimalist. As a rule, if you search for “ultralight” cookware you’re unlikely to find things like skillets and spatulas.
That’s not to say that you can’t still find a lightweight spatula and, with enough research, find the lightest possible variant of whatever cookware you’re seeking. It just might not be easy all the time.
Pros of Ultralight Cookware
Cons of Ultralight Cookware
The 5 Key Categories of Backpacking Cookware
Below you’ll find a quick summary of the five main categories of backpacking cookware. You’ll also notice plenty of links within each section if you need more information.
Backpacking Stoves
As we said earlier you’ll have to decide what type of backpacking cookware suits your style. Some of the best names in backpacking stoves include:
If you’re looking for an ultralight stove you might seek out:
Since backpacking stoves come in many unique styles, I tried to pick two of my favorite stoves. One stove is a more traditional canister stove option which is great for more advanced cooking and precise control. The other pick is an ultralight option for those with extremely minimal meal preparation needs.
Value Pick:
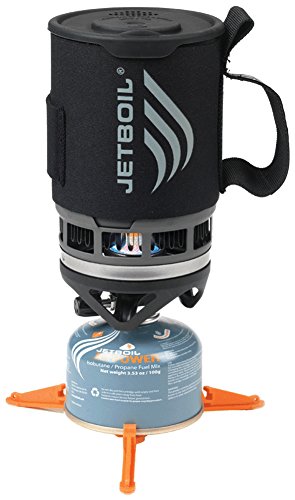
JetBoil Zip
I chose the Jet Boil Zip canister stove for several reasons. Among them is the reputable name of JetBoil and their reliable equipment. The stove is also:
- Easy to use
- Compatible with standard gas canisters
- Large, stable base
- Versatile boil or simmer adjustment
This stove is light enough for most backpackers to enjoy. It’s also large enough and features plenty of simmer control for cooking more refined meals like pancakes and bakeries.
While it’s empirically perhaps the most popular backpacking stove I’ve ever seen on the trail, it does have a bit of a drawback. To get the most out of this stove you’ll have to use JetBoil specific pots and pans with it.
You’ll want to bring along a lighter or matches to light the stove. Unfortunately, it doesn’t have a Piezo ignition built in, but that’s a minor drawback.
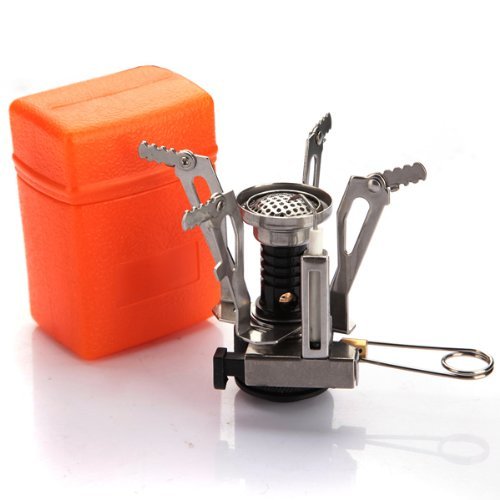
Ultralight Pick: Caldera Keg-GVP Stove System
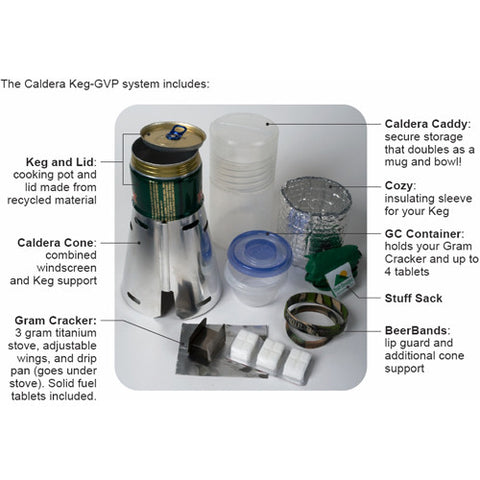
Among the many problems with ultralight backpacking stoves, almost all of them are solved by this stove system. It’s a complete set so you won’t have to hunt around for pieces!
- Large, stable base for pot support
- Efficient windscreen
- Extremely lightweight
- Esbit solid fuel tablets
Unlike most ultralight backpacking stove setups, the Caldera Keg has a built-in windscreen. This makes the stove safer and more efficient. Plus the wide, stable base also helps support the pot. Since burns are one of the biggest causes of backcountry injuries each year, it’s nice to have an ultralight stove that’s stable!
Don’t be mistaken, this stove system is everything you need to cook with the freezer bag method. Pot, windscreen, lid, and all accessories are included and well refined.
I personally use this as my solo backpacking stove of choice. It’s hands down the best ultralight stove kit I’ve ever found!
Learn more about the Caldera Keg, JetBoil and other products by reading our in-depth article on the best ultralight backpacking stoves.
Backpacking Messkits
It’s totally possible to buy every piece of cookware you’ll need for your next backpacking trip without purchasing a mess kit. However, most hikers don’t like to hunt for every individual item separately.
For a huge majority of hikers, a quality backpacking mess kit has all the utensils you’ll need at a reasonable price.
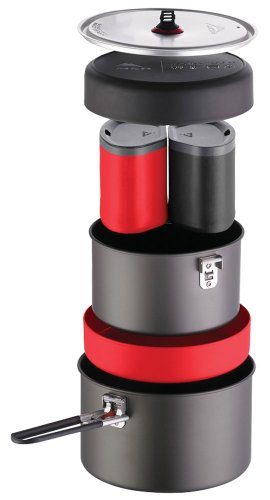
Of all the backpacking gear, mess kits and utensils are perhaps the most scattered by brand. If I could narrow down the space to a single manufacturer that makes a variety of quality utensils and mess kits I would choose MSR.
While it’s not “ultralight” in the purest sense, it is an incredibly lightweight and versatile mess kit. I chose the two-person mess kit because it’s the most flexible kit for hiking by yourself or with a partner.
- Add or remove pieces to suit
- Approx. 14 ounces per person
- Plate, mug, and pot included
If you end up using a mess kit like this it’s going to function best with a standard canister or liquid fuel stove. It’s not a JetBoil specific mess kit but it will work with a JetBoil stove if you want.
There are two pots, two mug, and two plates/bowls. For that reason, it’s an ideal mess kit for two people making simple meals. There’s no skillet or frying pan and your ability to cook is limited to what you can pull off in two small pots.
If you solo hike you can always pare it down to just one pot, one plate, and one mug which will probably weigh about 14 ounces for a single person.
To make this mess kit perfectly rounded for all situations you can add a skillet or frying pan to cover all your needs.
If the MSR Quick 2 System doesn’t seem like your “cup of tea,” read this article reviewing the top backpacking cooking sets for more ideas.
Best Backpacking Utensils
Okay, I’ll admit – backpacking utensils covers a lot of stuff! However, standard items like ladles, spatulas, and pan scrapers go a long way to covering the bases.
That’s what we’re going to cover here. Since the overwhelming vast majority of hikers use simple cooking setups, I’ll focus primarily on that. Of course, if you want to explore other options to suit your taste, be sure to visit our in-depth backpacking utensils review.
So what utensils are really needed for the majority of backpacking cooking? Usually boiling water or reheating ingredients is the only cooking method needed. To save space and weight the best utensil for achieving this while also being able to eat is:
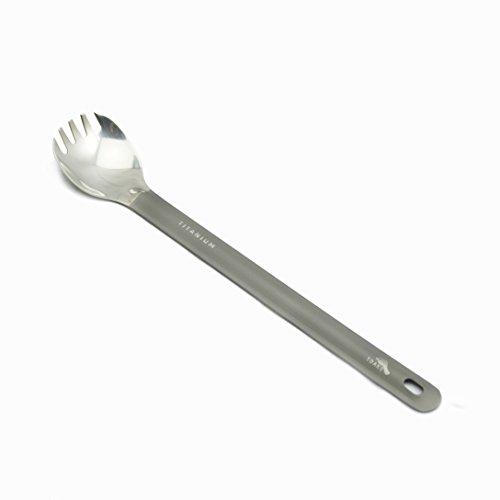
Yep, we’re going back to the high school cafeteria where everything is eaten with a spork. Fortunately, these titanium sporks are rigid, durable, and extremely effective at cooking and eating just about every type of backpacking food.
- 0.65 ounces total weight
- Long handle
- Titanium construction
I’ll tell you right now – if you go with the cheap plastic backpacking sporks you’ll be let down. They snap at all the wrong times and you’ll be shoving your whole hand into the pot to scoop out food with the remnants of a broken spork (oddly specific, you’d think I’ve had to do this before…).
Most titanium sporks and spoons were (and many still are) made with a matte finish. This rough finish is a perfect breeding ground for bacteria on utensils. That’s one of the big reasons I love the polished bowl on this spork. It’s easy to clean quickly and safely.
For both freezer bag cooking and the deep pots of the common JetBoil stove systems having a long-handled spork or spoon is perfect. Shorter utensils are going to force you to push your hands into the bag or pot which gets dirty and messy fast. Just carry the extra 1/10th of an ounce for a longer handle.
Backpacking & Camping Mugs
Not everyone needs a backpacking mug. However, I’ve met my fair share of warm drink lovers on the trail.
If you’re a coffee or tea fiend and you just must have your warm drinks for breakfast and bedtime, a mug may be essential. For me, well, I don’t carry one at all but I’m often jealous of the others who do!
Yes, you can use a mini Nalgene for a warm drink but it won’t hold the heat well at all and the lack of a sippy lid is a real killer. So, let’s take a look at my number one pick for those who just can’t leave home without their favorite mug.
Okay, so it was a bit hard to pick out the “best” mug for backpacking. In this case, since we already talked mess kits and other cookware I decided to recommend a mug that’s 100% meant for hot drinks only.
Many of the best choices for backpacking mugs are the ones that can serve multiple functions. Since we’re skipping over some of those this time, be sure to read through our in-depth backpacking mugs article for the low-down on those.
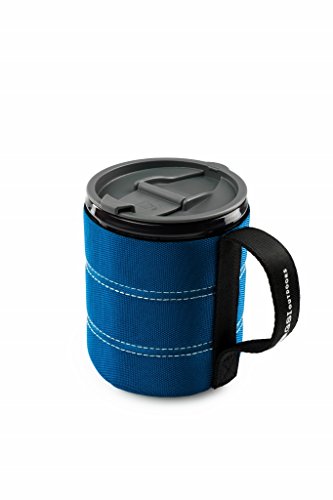
The GSI Infinity Mug is an insulated, dedicated hot drink vessel for the trail. Some of its best features are:
- 3.5 ounce weight
- Sealable lid
- Traditional mug shape and handle
I gotta admit – if you’re taking a mug along on the trail it might as well have the accommodations of modern drink mugs. That’s why I think the Infinity beats out other mugs like double wall titanium mugs. Having a sealable lid helps keep the temperature in and the drink in if you stumble around camp.
In order to make the most of having a hard-walled mug in your pack, you’ll want to keep it cleaned out. That way you can stuff other goodies inside it to make your pack space as efficient as possible.
Hopefully, you’ll be able to make the most of your pack space with that trick and the fact that the Infinity mug has a collapsible webbing handle. Just be careful how you drink from the mug because the soft webbing handle can be a little “floppy”. You can’t hold it just by the handle or it might slip.
Backpacking Frying Pans
I alluded to it earlier and now we’ll go in depth. Frying pans are the only solution to advanced cooking on the trail. Of course, they range from tiny and lightweight to large and capable. Choosing the “best” one wasn’t an easy task.
When you’re looking for the ultimate backpacking frying pan to accompany your adventures you’ll have to make your own calls. What size you need depends on how many people you’re cooking for. If you want to do some baking you may even have to go with a Fry Bake which you can learn more about by reading through our in-depth article.

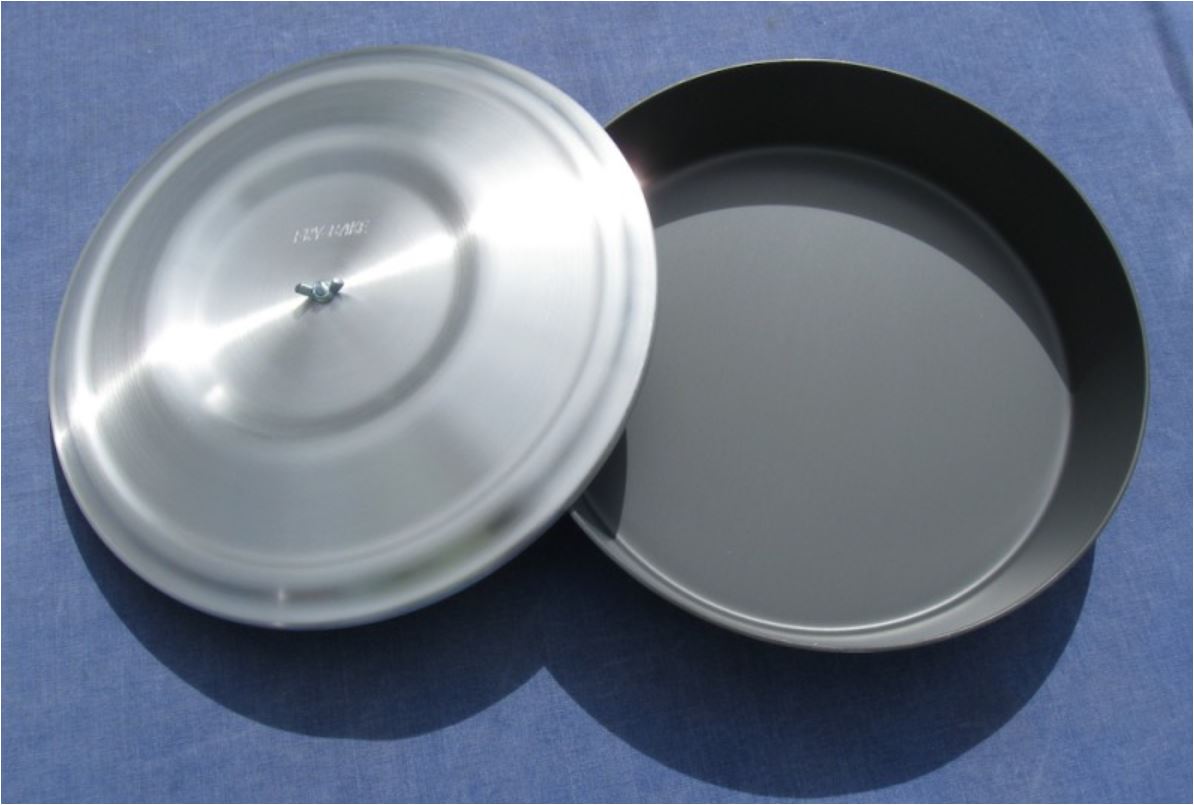
I chose the Fry Bake set because it allows the most versatility and flexibility for a range of cooking and baking. Unlike most skillets and frying pans, you can almost cook anything you want in this!
Fry Bake is a rarely seen backpacking frying pan that doubles as a versatile baking tool. While you can customize them almost any way you want, they are:
- 11+ ounces
- Pan plus lid
- Lightweight spun aluminum
To use a Fry Bake, you’ll need a pot holder since there’s no built-in handle. These frying and baking pans are best used with stoves that have good simmer control. Stoves like the MSR Whisperlite and Dragonfly are ideal for using with a Fry Bake.
You can do everything from frying Rainbow Trout to baking backcountry bread in a Fry Bake.
With practice, I think they’re the most versatile backpacking frying pan available. They are a bit bulky, however, and the stoves to use them are best used for multi-person backpacking trips. Once you master the Fry Bake you’ll be the undisputed Iron Chef of the woods!
For tons of Fry Bake worth recipes in the backcountry, consult the NOLS Field Manual for Cooking. It is, perhaps, the most comprehensive guide to recipes conducive to Fry Bake use out there.
But if you’re not sure if the Fry Bake is right for you, check out this detailed article about other great backpacking frying pans.
A Note About Freezer Bag Cooking
I mentioned FBC in several places throughout the article. If you’re unfamiliar with freezer bag cooking (FBC) I’ll walk you through it here. I’m also going to make a few notes and tips on how to use FBC to your advantage.
Freezer bag cooking is essentially making your own dehydrated meals at home. Using a single gallon Ziploc freezer bag you simply measure the ingredients you need, put them in the bag, and then pour boiling water directly into the bag on the trail.
Of course, the really tricky part is coming up with the recipes and tailoring them to your needs.
There are several advantages to FBC:
some disadvantages
One of the biggest advantages of freezer bag meals is that they unlock the potential to use extremely lightweight stoves. Because all you need to do is boil water, you can easily use Esbit or alcohol stoves. There’s no need for simmering of flame control.
Many ultralight stove setups can easily get down to 2 ounces or even less. Compared to large liquid fuel stoves like the MSR Dragonfly that’s a 12+ ounce savings (not including the fuel can). All said and done an ultralight stove setup for FBC can be 2+ pounds lighter than a full-featured liquid gas stove and cookware setup.
On the flip side of the coin, you’ll have to give up advanced meal prep like frying, baking, and simmering. It all depends on what’s more important to you: advanced meal prep on the trail or a lighter pack?
If you’re curious about some freezer bag cooking recipes and meal ideas, you can read our in-depth list of backpacking meal ideas (many of which are FBC ready).
Conclusion
We’ve covered practically every different type of backpacking cookware. Now that you’ve had the rundown it’s time to really look at yourself and decide what type of cookware is best for you.
Do you love hot drinks? Maybe you should be carrying a backpacking mug. But perhaps you don’t need the advanced flame control of a liquid fuel stove, so you could save some weight by opting for an ultralight alcohol stove.
If there’s one thing I’ve learned from guiding trips, hiking the trail by myself, and talking with other backpackers it is that each hiker has their own preferences. There’s no right answer about what the “best backpacking stove” is for everyone. Of course, I’ve tried to present both sides of most arguments on all the pieces of gear we’ve covered today.
Don’t be surprised if you end up changing stoves and cookware several times throughout your hiking career. I usually use an ultralight stove for freezer bag cooking. However, I still keep an MSR Whisperlite on hand for when backpacking with groups or camping in a situation where I want to cook more advanced meals.
Enjoy the journey!